One of my stipulations for owing a car is that it has to have the capability to pull a small aluminum trailer and a motorcycle. I race dirt bikes and often haul my street bike up to the Mountains to go carve some turns for a weekend.
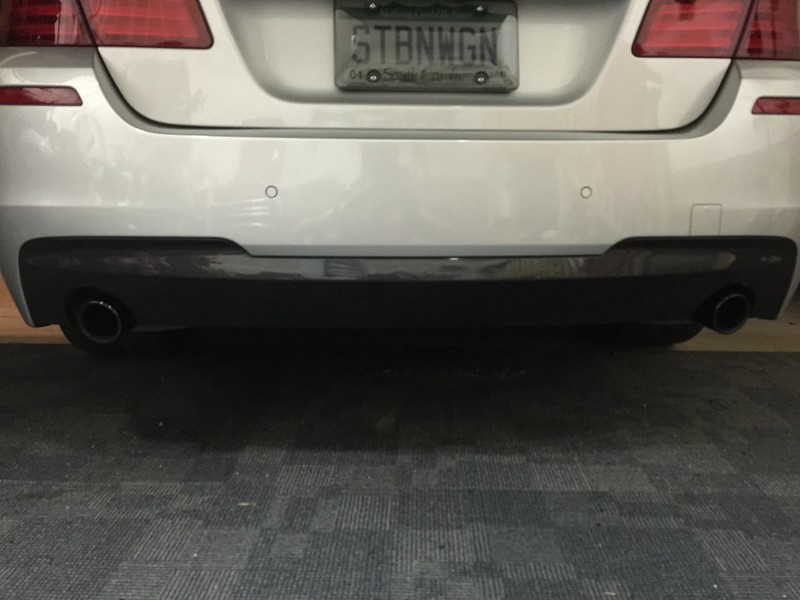
The biggest gripe I have about putting a hitch on a car is the fact that you can see the tow bar hanging in the back. IMO it ruins the rear end of a car; its an unpleasant sight.
I found a company out of Atlanta, GA called Invisihitch
http://www.invisihitch.com that provides exactly what I was looking for. I worked with Linsey and Steve, they were able to answer all my questions and give me 100% confidence in their product.
I figured there might be some others that were interested in a product like this and were intrigued on what it takes to install.
***DISCLAIMER*** I skipped some steps simply because the forums are already full of threads on how to accomplish certain tasks. No need to create another one. And of course, I accept no responsibility for others performing this DIY.****
First you start out by removing your rear bumper, brake lights, and pulling free the inner carpet of the trunk.
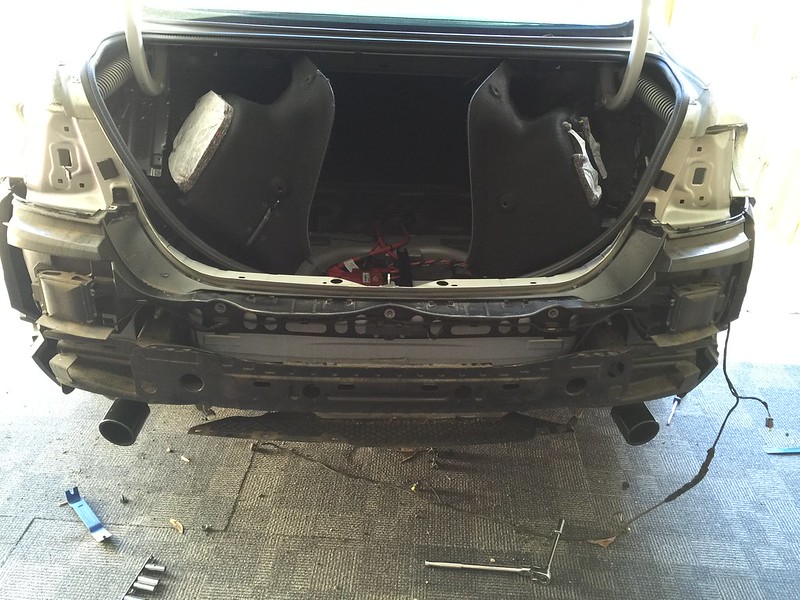
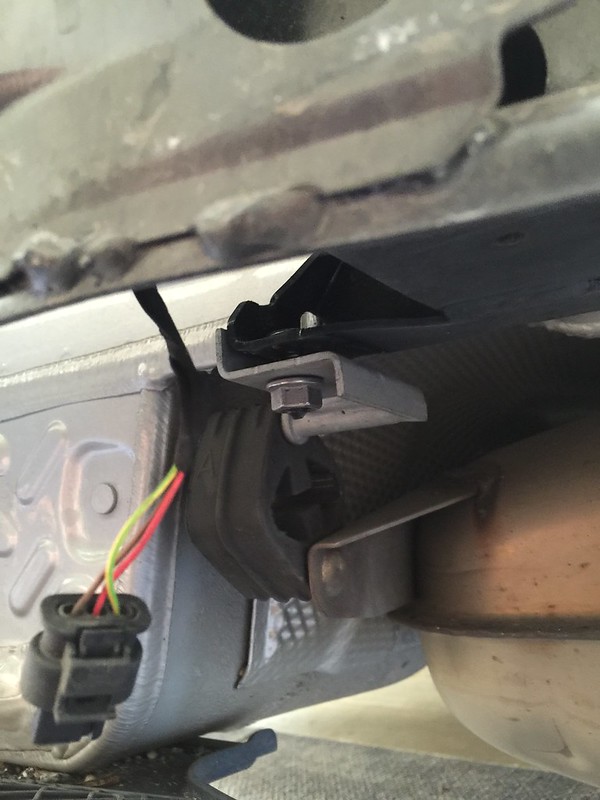
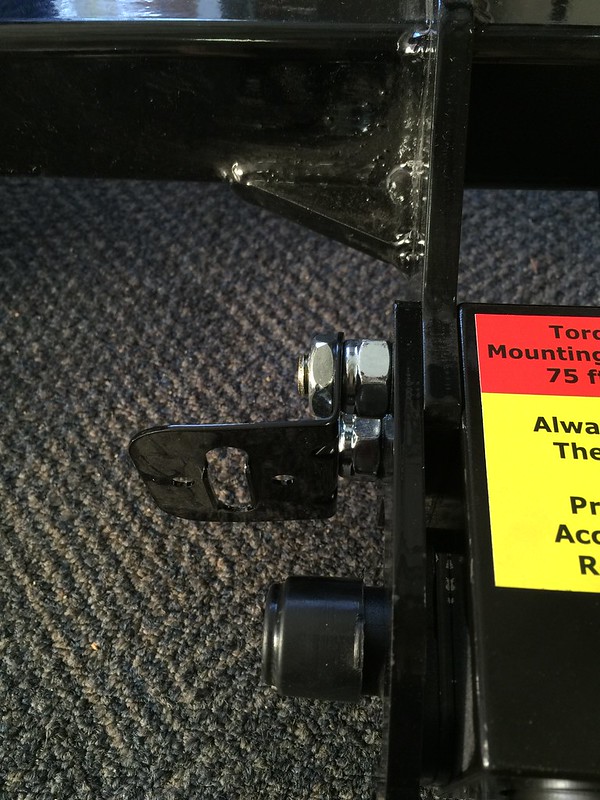
Remove the 13mm nuts that hold the exhaust brackets to the support beam (2 total, 1 on each side).
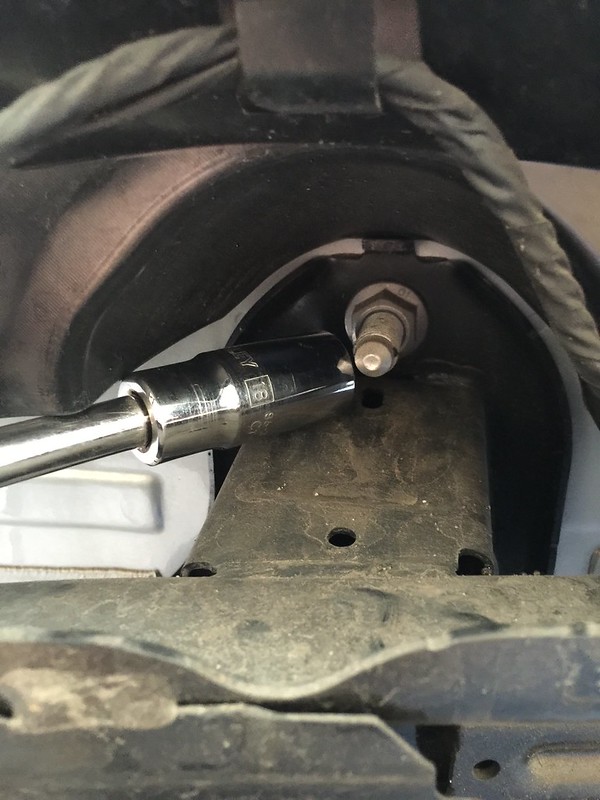
Remove the 18mm nuts from the bumper support beam (4 total, 2 on each side).
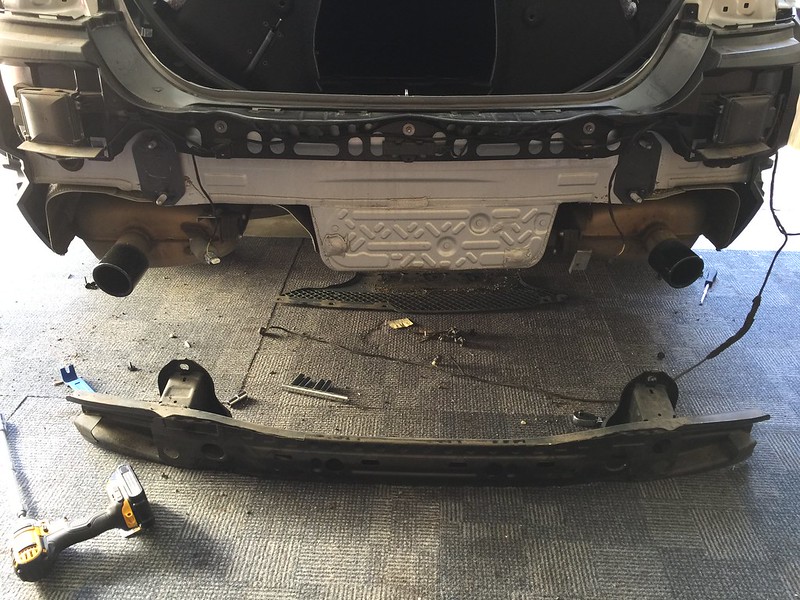
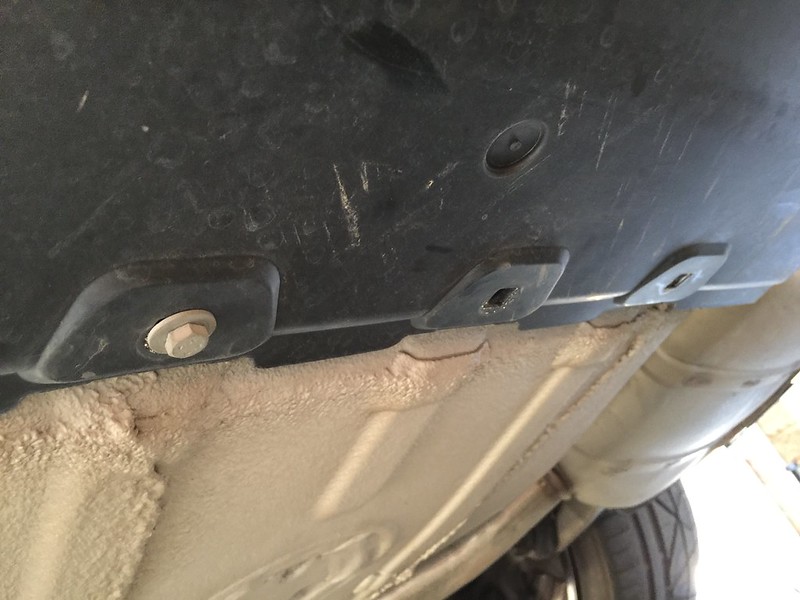
Remove the 3x13mm bolts that hold on the debris guard on the rear of the body.
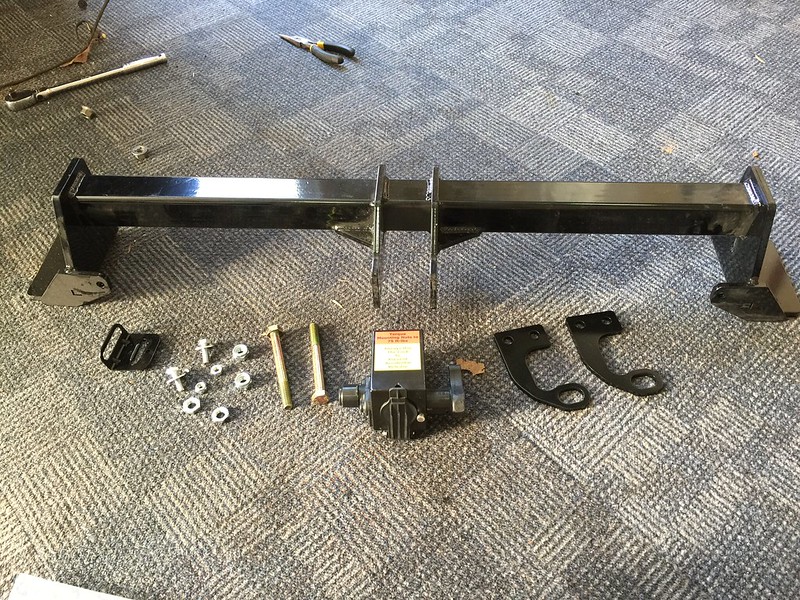
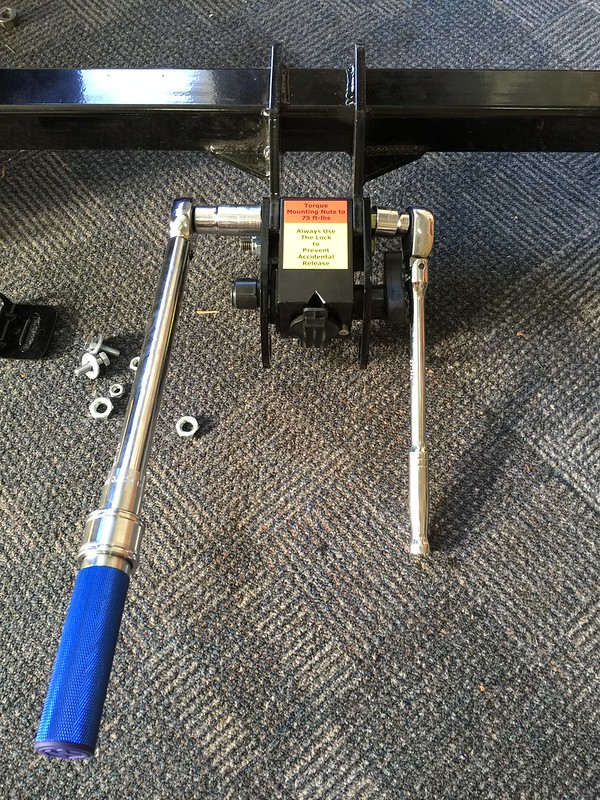
Assemble the receiver to the hitch beam.
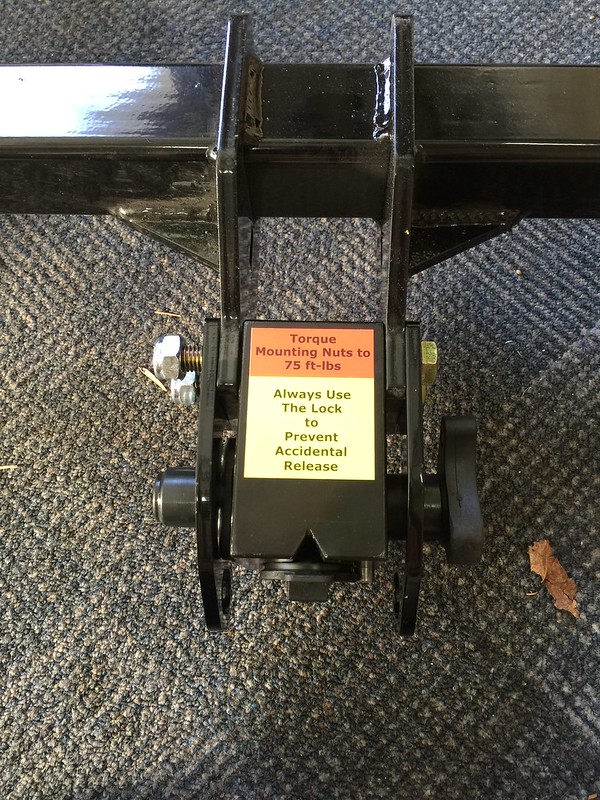
Torque to appropriate specs.
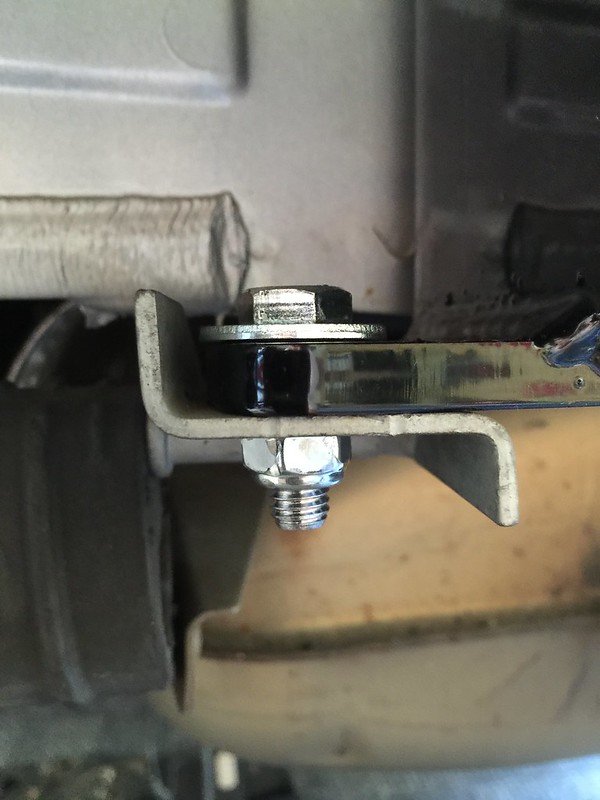
Install the mount for the trailer lights plug.
Install hitch in place of the bumper support, reinstalling the 18mm nuts.

With the supplied nuts and bolts, re-attach the exhaust hangers.
Next is the wiring harness.

I ran the harness through a body plug on the drivers side. I cut a small hole and pulled the wiring harness through making sure it was a tight fit to keep moisture out.

Mount the wiring harness computer with provided double sided sticky tape.
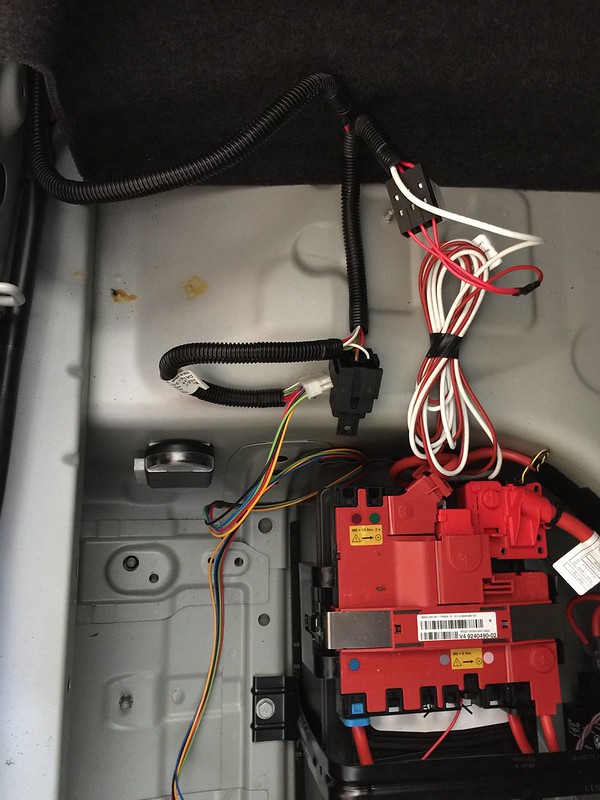
I also mounted the relay to a existing mount point that another device was mounted on and used double sided sticky tape to mount the fuse connection to the car as well, didn't want to hear anything bounding around as I drove. (No picture. Sorry)
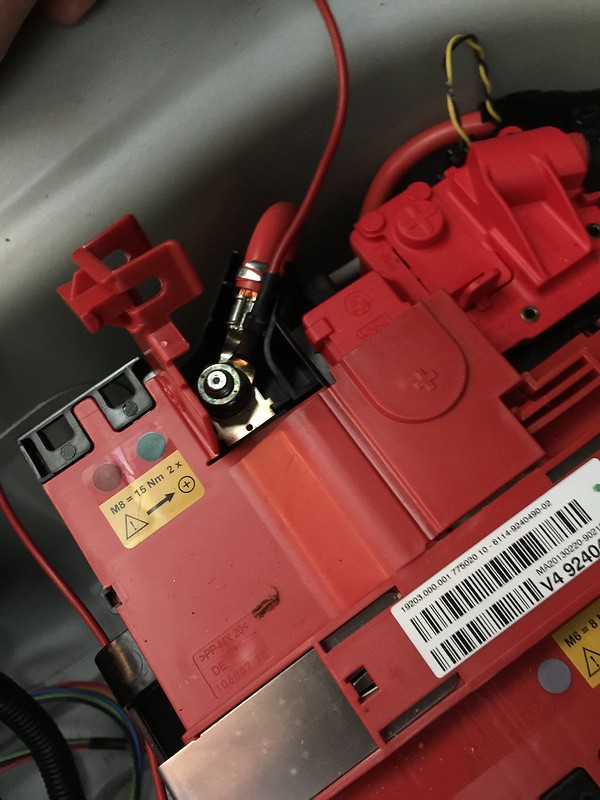
Attach the positive wire to a positive terminal at the battery.
Now here is where it took some figuring out on my part. The wiring color scheme that Invisihitch provided was different on my car (13' f10 m-sport) so I had to figure out what wires did what.
Passenger side:
- Blue/Brown = Right Blinker
- Grey/Yellow = Tail Light
- Green/Grey = Brake Light
Driver Side:
- Blue/Green = Left Blinker
- Purple/Light Purple = Tail Light
- Green/Blue = Brake Light
Given that information I was able to attach InvisiHitch wiring harness and use the provided wire taps and connect the wiring harness to the vehicle. I then found a appropriate ground and attached the negative of the wiring harness to it.
I used a test light and tested each light output at the output end of the harness.
I found that one of the wires on the harness was switched. Yellow on the harness input which is supposed to be the left blinker, resulted in yellow being the right blinker at the output of the harness. Same went for the green wire of the harness; which was supposed to be the right blinker on the input. It ended up as the left blinker of the output of the harness.
With that in mind, I was able to make the appropriate corrections connecting the flat 4 connector for the trailer lights plug.
Now with the wiring completed and tucked away appropriately, I reinstalled the trunk carpet, tail lights and bumper. ****Notice you cannot see the hitch at all?!****
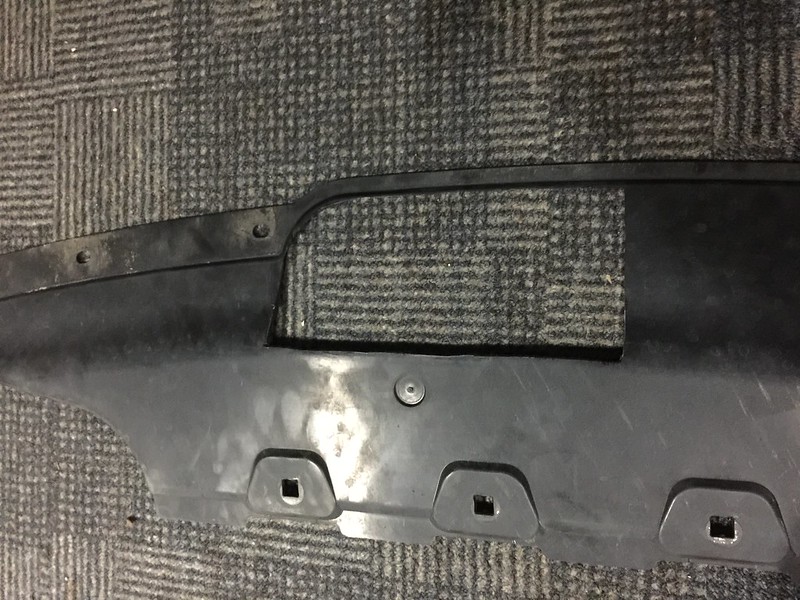
Here is were you have to do some cutting: In order to access the hitch, you need to cut a hole in the debris guard. I figured out exactly where I needed to have access in order to access the lights plug, locking mechanism and the release mechanism. Once you're finished trimming it appropriately, reinstall.
Here is a picture of the hitch receiver installed.
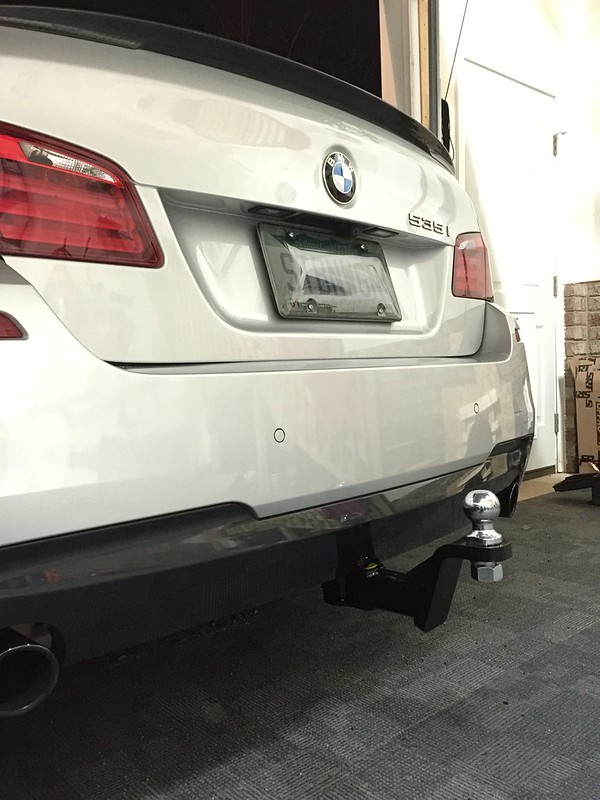
It is very stable and has very little play and it doesn't touch any part of the bumper trim. I am very impressed with this setup.
Ease of installation? I'd give it a 2 on a 1-10 scale. Fit is a 10. Ease of use is a 9; Being that the release mechanism is up in the bumper, its a little difficult to get to, but I could cut the debris guard hole larger to make it easier. I also ordered a 1 1/4" square tube receiver so that that I could use my Thule bike mount as well with the system.
The system cost is $548. Shipping for me was about $70 and I received it the very next day.
Like I said, Steve and Linsey were a pleasure to deal with so if you're interested give them a call at 678-400-0121
Any questions or comments, please don't hesitate to ask!