Quote:
Originally Posted by zzzbullseye

So I changed out my pads and rotors this weekend, and thought I'd add some pictures I snapped during the process. The info in this thread is helpful and informative, but I'm suspecting there are others out there that may be wondering what the EMF actuator looks like, and could benefit from a look at the components before they start the pad/rotor replacement process. I didn't take pictures of the entire process, just the parking brake / EMF actuator removal and reset portion of the procedure on the rear axle.
I happened to stumble across this PDF that explains the EMF actuator operation and function. Kinda cool info with some detailed graphics.
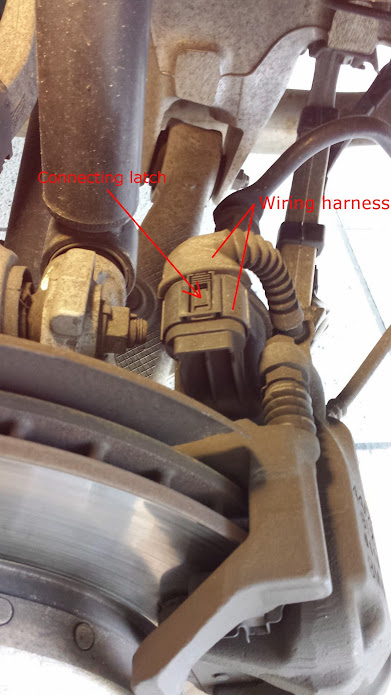
This is a pic of the EMF actuator shown as attached to the back of the caliper body. The wiring harness that connects to the top of the EMF actuator should be removed for easier manipulation of the actuator once it's removed from the caliper body. Remove this by pressing down on the latch and pulling away from the actuator.
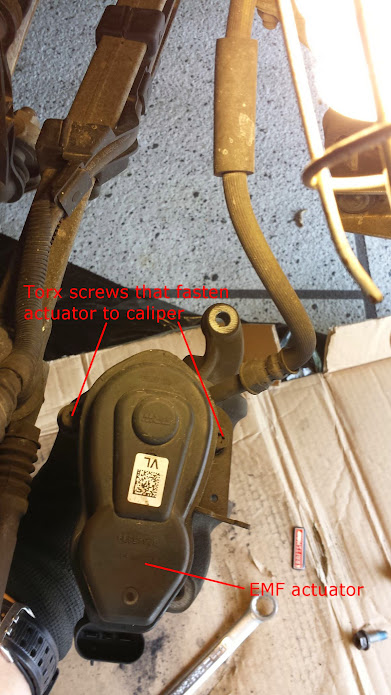
This is a photo of the EMF actuator and caliper body assembly after having been unbolted. The actuator can be separated from the caliper by removing the two torx screws as noted in the pic.
The EMF actuator after having been separated from the caliper body. Set this aside as you continue with the rest of the procedure.

This picture shows the spline hole at the back of the caliper body once the EMF actuator has been separated from the caliper.

Insert a 7mm allen wrench into the spline hole and rotate clockwise until the limit is reached and the actuator is reset. Once complete, the caliper piston can be compressed.
 |
Thanks for taking photos. It's very helpful. I wish more people would do the same for all the DIY's.