

| BMW Garage | BMW Meets | Register | Today's Posts | Search |

|
|
|
 |
2010 2011 BMW 5 Series Forum F10
 BMW 5-Series (F10) Forums
Regional Forums
UK
Headlight condensation BMW 5-Series (F10) Forums
Regional Forums
UK
Headlight condensation
|
 |
Post Reply |
|
|
Thread Tools | Search this Thread |
| 01-12-2022, 03:42 AM | #1 |
|
Second Lieutenant
 44
Rep 275
Posts |
Headlight condensation
Anyone else's headlamps full of condensation? I'm worried the water will get to the control board that's at the bottom of the unit and fry the board
  |
| 01-21-2022, 12:27 PM | #5 | |
|
Brigadier General
 
1983
Rep 3,216
Posts |
Quote:
Yes, it'll stop water spraying up, but it'll also stop water flowing down. Unless you've got obvious signs of water ingress, and they are causing problems, it's a non-solution |
|
|
Appreciate
0
|
| 01-21-2022, 03:01 PM | #6 |
|
Second Lieutenant
44
Rep 275
Posts |
I managed to get a new Hella replacement from Amazon for £465 (for info the forum bmw dealer quoted £750)
You have to use some of your existing bits like the xenon bulb, led drivers, etc. Took me a couple of hours |
|
Appreciate
0
|
| 01-21-2022, 04:39 PM | #8 | |
|
Captain
150
Rep 965
Posts |
Quote:
|
|
|
Appreciate
0
|
| 03-07-2022, 09:39 AM | #9 |
|
Registered
0
Rep 2
Posts |
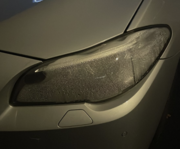
I saw this post and registered here, hoping my experience will help someone.
Sadly I didn't take any pics while fixing it. My issue was that my right headlamp got full of condensation after driving in the rain, or washing the car. It has to be fixed soon, because otherwise the electronics inside will fail and that's another expense. The issue is in the headlamp's design itself. If the upper seal isn't perfect, water will drip in because the joint where the clear plastic lens and the headlamp body meet is turned towards the front of the car and angled in a way that enables water to come in. I managed to seal the upper part of the headlight with neutral clear silicone caulk, without removing the front bumper. It's advisable to do this somewhere warm, if it's too cold the plastic becomes even more brittle and it's much easier to break something. Had to remove all the plastic clips and covers in order to gain access to the top of the headlight. Along with the two torx screws on top of the bumper, this enabled me to move the bumper enough to remove another plastic clip (or maybe rubber seal, I don't fully remember). The black metal clip on top of the headlight also has to be removed. After I gained full access to the upper portion of the headlamp, I thoroughly cleaned the plastic around the seal, wiped it dry with a microfiber cloth and gave it some time to fully dry. Then I carefully applied silicone along the upper seal. I wasn't too stingy with it, I really didn't want to be doing it again. Then I let the silicone dry for half an hour and reassembled everything back together. To let the interior of the headlight fully dry, I removed the service access "door" while the car was parked. It fully dried in about two days of cold weather. I also used some silicone spray to lubricate those mechanisms in there.  It's been a while now and the condensation hasn't come back either during rain, or pressure washing the car. Here's a pic of the fix I just took, you can see a bit of the clear silicone caulk.  |
|
Appreciate
0
|
| 03-07-2022, 10:28 AM | #11 | |
|
Major
 
364
Rep 1,261
Posts |
Quote:
|
|
|
Appreciate
0
|
Post Reply |
| Bookmarks |
|
|


